Setting up business Wi-Fi properly requires going well beyond merely plugging in a few access points and hoping for the best. It is about laying a solid foundation. This serves as the blueprint for a high-performance network, and getting it wrong at this stage means building on an unstable base.
Planning Your Business Wi-Fi Foundation
Before a single access point (AP) is mounted on a wall, the real work has already begun. We have seen it time and again: businesses fixate on shiny new hardware, only to end up with dead spots, frustrated users, and a bill for a costly redesign. True success begins with a deep dive into your unique physical and digital environment.
A proper Wi-Fi deployment does not start with an attractive coverage map. It starts with a real-world site survey. This is more than just a casual walk-through; it is a technical investigation into your venue's specific radio frequency (RF) landscape. A busy retail store, for instance, is a minefield of interference from electronic displays, security sensors, and even shoppers' own mobile hotspots.
Similarly, a hotel is packed with signal-blocking materials like concrete and steel. A professional survey uncovers these interference sources and architectural quirks, allowing you to plan AP placements that actually deliver on the promise of solid coverage, rather than just theoretical signal strength.
Estimating User and Device Density
Next is gaining a realistic understanding of user and device density. Planning for average use is a classic mistake. A network that runs smoothly at 9 AM can grind to a halt during the lunchtime rush. You absolutely must plan for peak capacity.
Consider these common scenarios:
- A Hotel Lobby: During the evening check-in rush, you could have dozens of guests attempting to connect simultaneously, each carrying a phone, a laptop, and perhaps a tablet. That is potentially 100+ devices concentrated in a relatively small area.
- A Retail Store: Picture a Saturday afternoon. You have hundreds of shoppers, staff with handheld scanners, POS systems, and security cameras—all competing for the same bandwidth.
- An Office Space: In a modern hot-desking setup, the number of devices in a single zone can fluctuate wildly from one hour to the next.
As a general rule, always calculate the absolute maximum number of people expected in any given area and multiply that by 2.5 devices per person. This buffer is crucial—it accounts for the rapid growth in personal and IoT devices and prevents your network from choking under pressure.
If you need assistance with the calculations, our access point calculator is an excellent tool for determining how many APs your space requires.
Assessing Your Core Infrastructure
Here is a hard truth: your new Wi-Fi is only as strong as the network it is connected to. Even the latest and greatest APs from top-tier vendors like Meraki or Aruba will underperform if your wired infrastructure is holding them back. It is time to evaluate your cabling and switches.
Are you still running on legacy Cat5e cabling? It might have been sufficient for 1 Gbps speeds, but it acts as a bottleneck for the multi-gigabit performance that Wi-Fi 6E and Wi-Fi 7 APs are built to deliver. Upgrading to Cat6a cabling is not just a good idea; it is essential for future-proofing your network.
Similarly, your network switches require a sufficient Power over Ethernet (PoE) budget. Modern APs, particularly those with multiple high-performance radios, are highly power-intensive. You must ensure your switches can supply PoE+ (802.3at) or even PoE++ (802.3bt) to prevent underpowered APs, which can lead to random reboots and unstable performance.
There is no denying the demand for rock-solid connectivity. In the UK, internet penetration is on track to hit 97.8% by the end of 2025. This wave is fuelled by the massive expansion of full fibre-to-the-premises (FTTP) networks, with initiatives like Project Gigabit aiming to connect 85% of UK premises to gigabit speeds. With such a powerful internet backbone available, a high-performance local Wi-Fi network is no longer a luxury for businesses—it is a critical necessity.
Wi-Fi Setup Planning Checklist
To help you get started, here is a quick-reference table that breaks down the key areas to focus on during your initial planning phase.
Using this checklist ensures you are not just thinking about coverage, but also about capacity, resilience, and future-readiness right from the start.
Now that your physical site survey is complete, it is time to design the digital side of your Wi-Fi network. One of the most common—and dangerous—mistakes a business can make is creating a single, flat network for everyone. If a guest’s device is compromised on that network, it can quickly escalate into a catastrophe if there is a direct path to your sensitive corporate data.
The solution is network segmentation. Using a combination of Service Set Identifiers (SSIDs) and Virtual Local Area Networks (VLANs), you can build multiple, isolated networks that all run on the same physical hardware. Think of it as building digital walls inside your venue, ensuring traffic from one network cannot simply cross over into another.
Creating Your Core Network Segments
The first step is to map out the different types of traffic your Wi-Fi will need to handle. For most businesses, a few standard segments are all you need to operate both securely and efficiently.
Here are the most common SSIDs you should plan on setting up:
- Guest Wi-Fi: This is your public-facing network, usually open or secured with a Captive Portal. It should be completely isolated from all internal business systems and have bandwidth limits in place to prevent any single user from consuming all the resources.
- Corporate Staff Wi-Fi: A secure, encrypted network exclusively for employee laptops and mobile devices. This SSID will serve as the gateway to internal resources such as file servers, printers, and private company applications.
- Point-of-Sale (POS) Systems: A dedicated and heavily locked-down network exclusively for your payment terminals. This network should be highly restrictive, allowing traffic only to and from the payment processor and absolutely nowhere else.
- IoT Devices: A separate network for all your smart devices, such as thermostats, printers, or security cameras. These devices often have weaker security, so isolating them prevents them from being used as a backdoor into your more critical systems.
This segmented approach is the foundation of a modern, secure Wi-Fi deployment. It contains threats by design. If a guest’s phone is infected with malware, that threat is trapped inside the guest VLAN, unable to view or interact with your corporate or payment networks.
The Great SSID Broadcast Debate
A frequently asked question is whether to broadcast SSIDs or hide them. Hiding an SSID (disabling the public broadcast of the network name) was once considered a decent security measure. The rationale was, "If attackers cannot see the network, they cannot attack it." In practice, this is merely security through obscurity, and it is almost completely ineffective.
Hiding an SSID does not secure your network. Attackers with basic, freely available tools can discover hidden networks in minutes. Furthermore, it often creates a frustrating experience for legitimate users and makes it a significant hassle for employees who need to set up their devices.
Our advice remains consistent: broadcast your SSIDs. Instead, focus your efforts on implementing strong security protocols. Proper encryption and authentication are what truly protect your network, not hiding its name.
VLANs: The Digital Fortress in Action
Let us put this into a real-world scenario. A hotel manager needs to provide excellent Wi-Fi for guests, secure access for the reception staff, and reliable connectivity for back-office operations and smart room controls.
Placing everyone onto a single "Hotel-WiFi" network would be a disaster waiting to happen. Instead, a proper setup would utilise a VLAN strategy to create distinct, secure zones:
Hotel-Guest(VLAN 10): A public network featuring a Purple Captive Portal for a seamless guest login experience. This VLAN is completely firewalled off from all other internal networks.Hotel-Staff(VLAN 20): A WPA3-Enterprise network for employee devices, granting them access to the property management system (PMS) and other internal tools.Hotel-Operations(VLAN 30): An isolated network exclusively for building management systems such as HVAC controls and smart lighting.
This design ensures that a guest streaming a movie in their room has absolutely no network pathway to the server processing credit card payments at the reception desk. This foundational security model is essential for any modern business. Naturally, Wi-Fi is just one piece of the puzzle; for broader guidance, these cybersecurity tips for small businesses offer excellent, actionable advice.
Integrating Purple for Smarter Passwordless Access
Once you have designed your core network segments and VLANs, it is time to elevate your security and completely rethink how people connect. This is where a platform like Purple comes in, transforming your Wi-Fi from a basic utility into a true strategic asset. You can finally say goodbye to outdated Captive Portals, insecure shared passwords, and the constant administrative burden of managing access permissions.
The objective is to set up Wi-Fi that is both incredibly easy for users and significantly more secure for your business. We will walk through how to configure a truly modern, passwordless environment for guests and staff, turning your network into an intelligent, identity-aware system.
Creating a Seamless Guest Experience
For guests, the mission is simple: make connecting as seamless as possible while keeping your network secure. We achieve this with OpenRoaming and Passpoint, two technologies that allow visitors to get online automatically and securely, without ever having to search for a network name or enter a password.
As a certified OpenRoaming provider, Purple makes this incredibly straightforward. Once integrated with your network hardware, you can enable these features with just a few clicks. Here is what that looks like in practice:
- A customer who has previously set up a secure profile (perhaps at another Purple-powered venue or through a partner app) walks into your hotel, retail store, or stadium.
- Their phone or laptop automatically recognises the OpenRoaming network, authenticates securely in the background, and connects.
- That connection is encrypted from the very first packet, representing a massive security upgrade compared to traditional open guest networks.
This automated approach does not just enhance visitor satisfaction by removing the usual friction; it also builds loyalty. A customer who enjoys a seamless connection experience is far more likely to return, and their device will simply reconnect every time they visit, just as it does at home.
The diagram below illustrates how VLAN segmentation works to keep your guest traffic completely separate from your sensitive corporate data when you set up Wi-Fi.
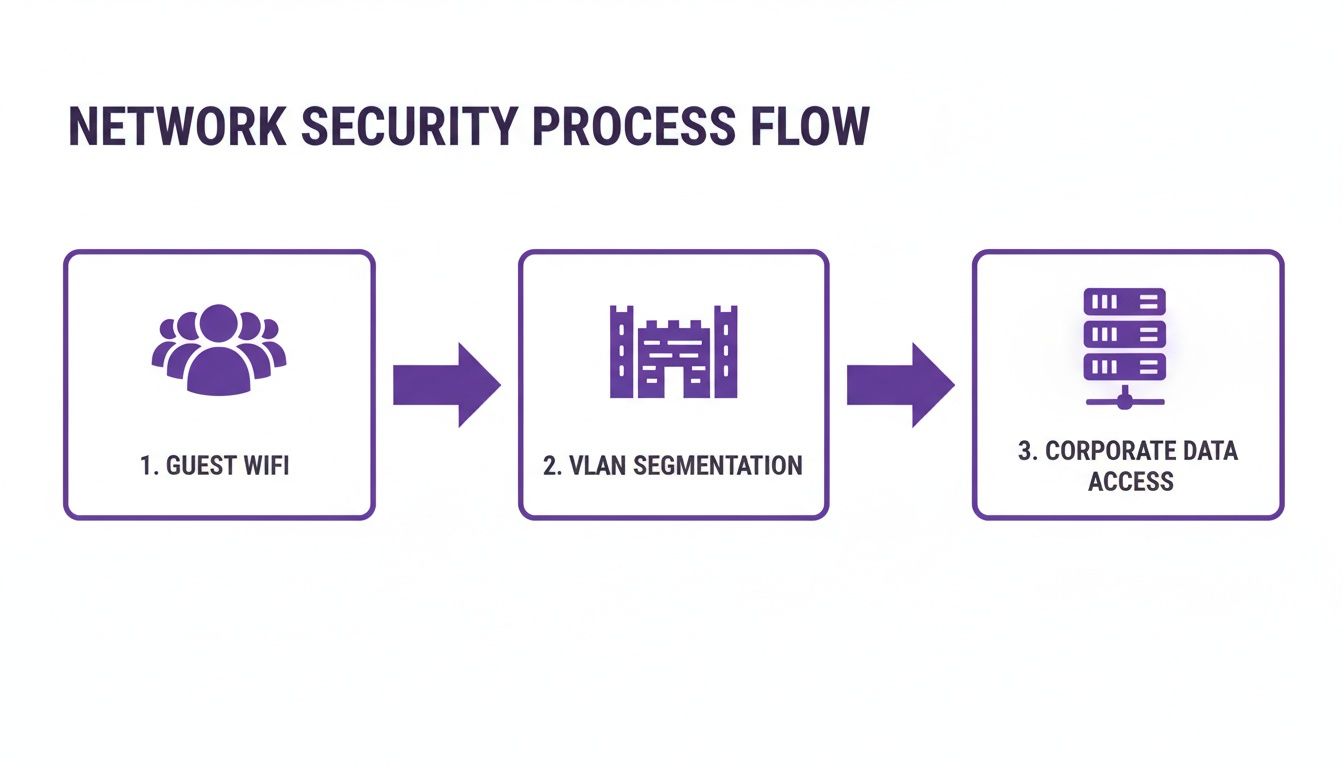
This visual effectively highlights the critical role VLANs play. Think of them as a digital fortress, ensuring that whatever happens on the public guest network remains isolated on the public guest network.
Enabling Zero-Trust Access for Staff
For your internal team, transitioning to a passwordless system is about tightening security and boosting productivity. By linking Purple to your existing identity provider (IdP) such as Microsoft Entra ID (formerly Azure AD) or Okta, you can implement a robust zero-trust access model. This finally moves you away from outdated WPA2-Personal passphrases, which are frequently shared and rarely changed.
Instead, access is tied to individual identity using digital certificates. When a new staff member joins and is added to Entra ID, Purple automatically issues a unique certificate to their device. This certificate acts as their network passport, allowing them to connect seamlessly and securely without ever needing a password.
The true advantage lies in centralised control. When an employee leaves, you simply deactivate their account in Entra ID or Okta. Purple then instantly and automatically revokes their Wi-Fi access across all your locations. There are no passwords to change, and zero risk of a former employee retaining access.
Securing Your Legacy and IoT Devices
Naturally, not every device on your network is equipped to handle sophisticated certificate-based authentication. This includes IoT devices—thermostats, printers, digital signage, or even point-of-sale terminals. These "headless" devices often lack the software required for 802.1X EAP-TLS. This is where Isolated Personal Security Keys (iPSK) come into play.
With Purple, you can generate a unique, long, and complex pre-shared key for each of these devices. Each device receives its own password and is firewalled into its own microsegment. If a single device is ever compromised, the breach is completely contained to that device, preventing lateral movement across your network. For a deeper understanding of this technology, you can learn more about how Purple's SecurePass feature facilitates this.
This approach ensures you can set up Wi-Fi that securely supports every single device in your environment, from the newest smartphone to the oldest printer.
This content has been crafted to read naturally, reflecting the insights of an experienced industry expert.
Vendor-Specific Guides for a Seamless Setup
While the core concepts of network segmentation and passwordless access remain consistent, the actual process to set up Wi-Fi can vary significantly depending on your hardware. Every vendor has its own dashboard, specific terminology, and unique ways of organising critical settings.
This is where we share insights from years of deployments. Consider this your quick-reference guide, saving you from navigating dense technical manuals for Cisco Meraki, Aruba, Ruckus, Mist, and UniFi. We will get straight to the point: where to navigate and what to look for when integrating Purple.
Navigating Cisco Meraki
Cisco Meraki is known for its cloud-first simplicity, and getting Purple running is a perfect example of this. Almost everything you need is located on the Wireless > Configure > SSIDs page.
Once you have created your new SSID, the primary task is pointing it to an external RADIUS server. You will find this in the SSID's "Access control" section.
- For staff Wi-Fi, select "Enterprise with my own RADIUS server". For guest access, choose "Splash page".
- In the "RADIUS" section, you will enter the IP addresses, port numbers, and the shared secret provided to you.
- If you are using a splash page, set the type to "Splash with RADIUS authentication" and paste the unique URL from your Purple portal.
The most common pitfall with Meraki is the "walled garden". You must add Purple's domains to this list so devices can successfully reach our login portal before they have authenticated. Overlooking this step is the primary reason a splash page fails to load.
Setting Up Aruba Central
With Aruba , whether you are using the Aruba Central cloud or a local controller, the logic is slightly different but equally powerful. In Aruba Central, you will first navigate to Global > Security > Authentication > Servers. This is where you configure Aruba to recognise Purple by adding it as a new RADIUS server.
Once completed, you need to connect it to your network. Navigate to Manage > Wireless > Your WLAN SSID > Edit > Access. Here, you will link the SSID to the RADIUS profile you just created. The Captive Portal URL for guest Wi-Fi is also configured here, under what Aruba refers to as the "External Captive Portal Profile".
A crucial tip for Aruba deployments is to double-check your user roles and policies. Aruba’s policy engine is incredibly granular. You must ensure the initial role assigned to a device has explicit 'allow' rules for DNS and DHCP, alongside access to Purple's portal domains. Addressing this single detail resolves most connection issues immediately.
Configuring Ruckus and UniFi
Both Ruckus (using SmartZone) and Ubiquiti UniFi follow a similar workflow. Each provides a dedicated section to define external RADIUS servers, which you then apply to your specific wireless networks.
- Ruckus SmartZone: Navigate to Services & Profiles > Authentication and create a new RADIUS server entry for Purple. Then, when editing your WLAN, simply set the Authentication Method to "802.1X EAP" and select the Purple server you configured.
- Ubiquiti UniFi: Within the UniFi Network Controller, begin at Settings > Profiles > RADIUS. Create a new profile for Purple here. Next, navigate to Settings > Wireless Networks, edit the appropriate SSID, and under "RADIUS MAC Authentication," enable the protocol and select your new profile.
To provide a clearer overview, here is how some of the key feature integrations compare across different hardware platforms.
Feature Integration by Network Vendor
Enabling features such as OpenRoaming or Single Sign-On can vary significantly from one dashboard to another. This table offers a quick comparison of where to locate these settings for the most common network vendors we work with.
While not an exhaustive list, this highlights the general workflow for each vendor. The core principle remains consistent: configure the network hardware to utilise Purple for authentication and splash pages.
The UK’s fixed connectivity market, which is on track to reach USD 36.57 billion, demonstrates the immense demand for reliable Wi-Fi. This trend is further accelerated by Ofcom sharing spectrum in the 6 GHz band, a move that 65% of WBA survey respondents view as "critical" for Wi-Fi 7. While larger enterprises lead in AI adoption (36%), platforms like Purple help bridge that gap with auto-provisioning features that reduce setup time from months to mere weeks on hardware such as Ruckus or UniFi. You can explore these market trends further in the comprehensive UK fixed connectivity market report .
By leveraging these vendor-specific guidelines, you can navigate the complexity and avoid common pitfalls that can easily derail a Wi-Fi project.
How to Test and Roll Out Your New Network

A successful network launch is never a coincidence; it is the result of rigorously testing your new setup. Simply turning on the system and hoping for the best is a guaranteed way to be overwhelmed with support tickets and leave a poor first impression. Instead, a methodical, phased approach ensures that when you do go live for all users, the experience is seamless.
Before a single guest or employee connects, your IT team must conduct thorough technical validation. This is your opportunity to confirm that everything planned on paper functions effectively in the real world. Do not be tempted to skip this step—it is where you will identify fundamental issues that become a nightmare to resolve once users are actively on the system.
Technical Validation Before Day One
The initial round of testing should focus entirely on the core performance of the network hardware and configuration. You are ensuring the foundations are solid.
Here is what should always be checked first:
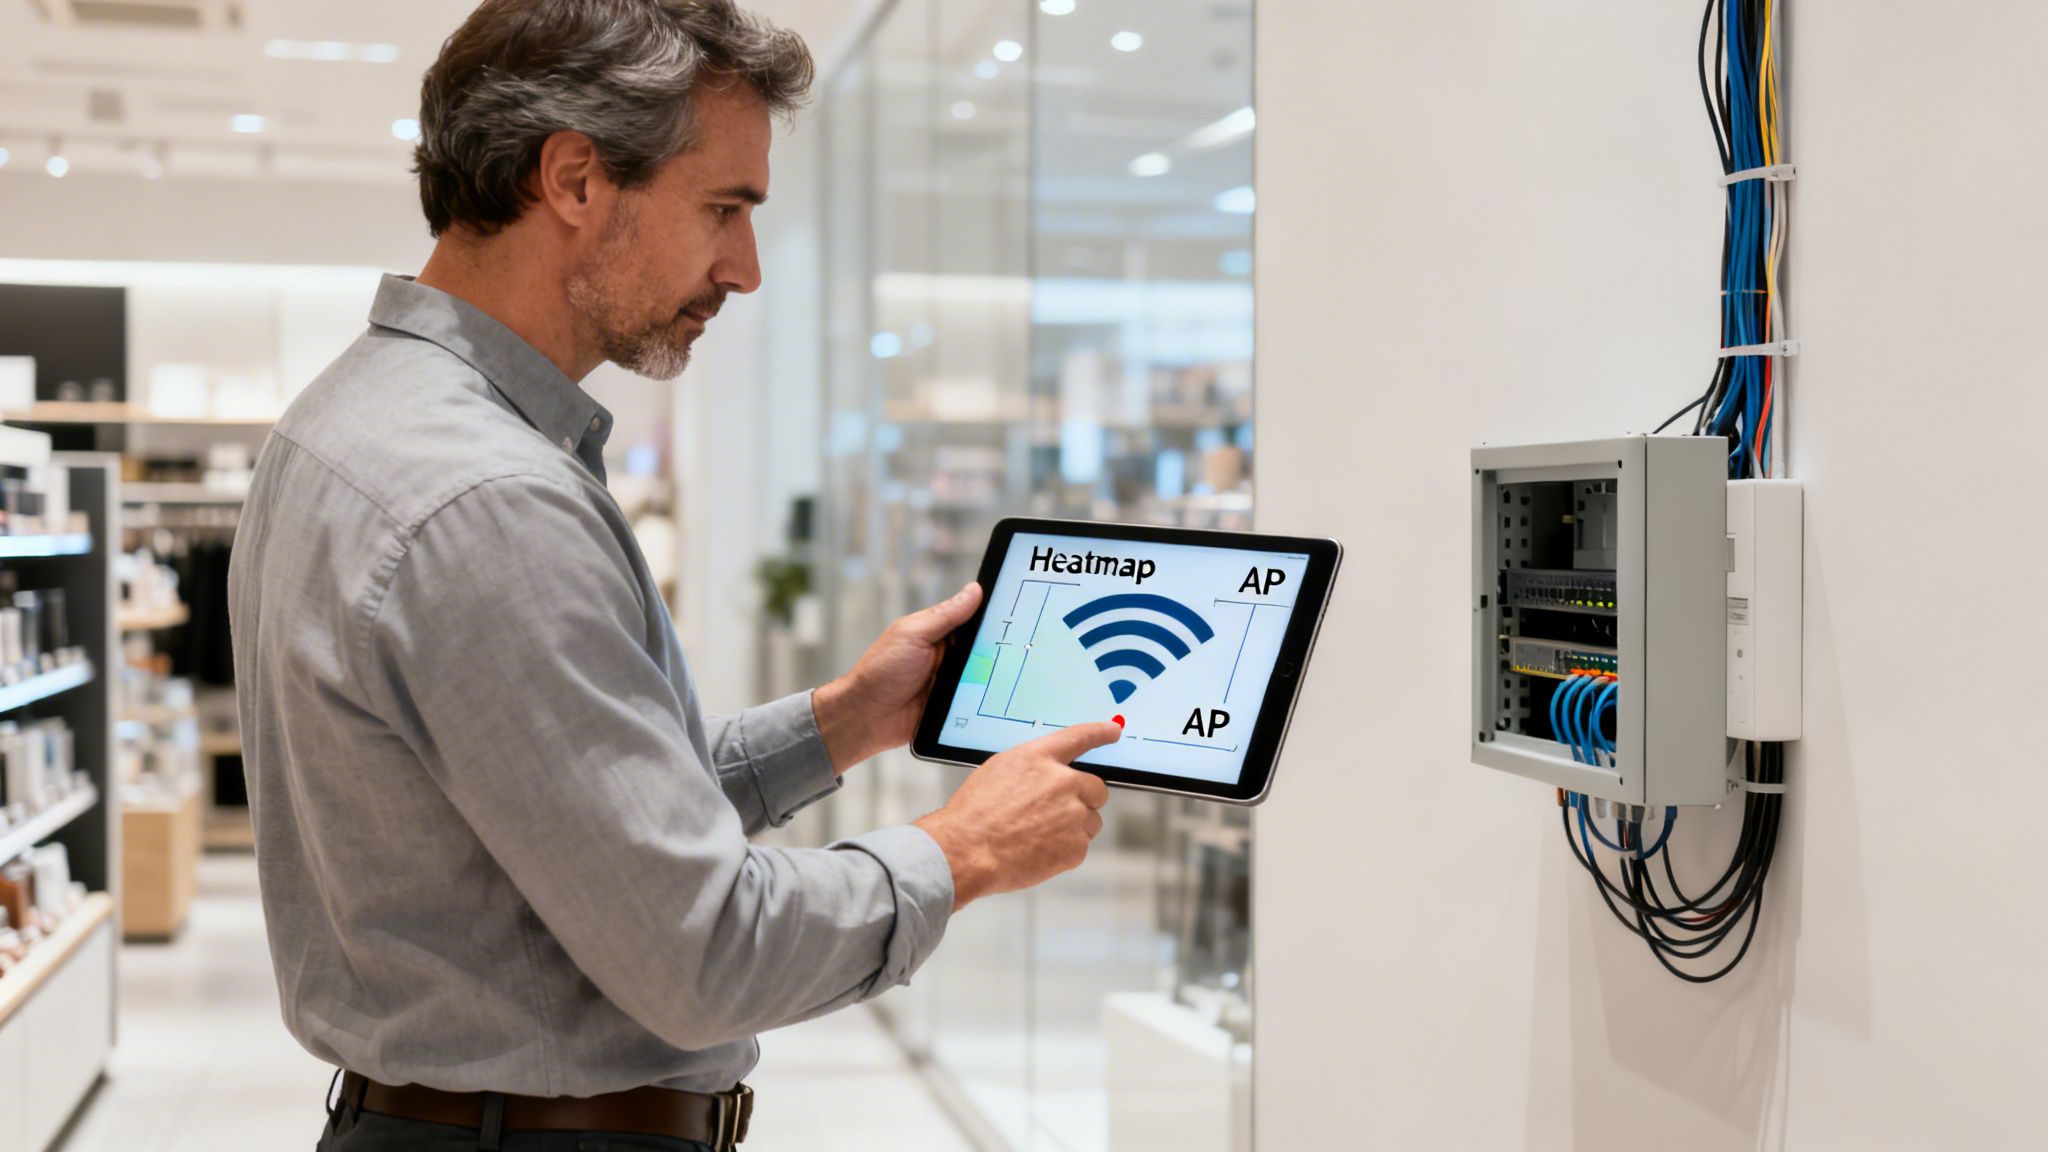
- Signal Strength Confirmation: Use a professional tool like Ekahau or even a basic analyser app to conduct a post-installation walk-through. You are verifying that the real-world signal matches the projections from your predictive surveys. This is where you identify and resolve unexpected dead zones before they become problematic.
- Throughput Analysis: Connect a device to the new Wi-Fi and run throughput tests using a tool like
iperf3against a server on your wired network. You are not merely looking for peak speed; you are checking for consistency. Is the performance stable, or does it fluctuate significantly? - Roaming Performance: This is crucial. Walk between the coverage zones of different access points while on an active voice or video call. The handover should be completely seamless, with zero dropouts. A failed handoff is a clear indicator that your roaming settings require adjustment.
A professional recommendation is to test with a mix of older and newer devices. An iPhone 15 might roam perfectly, but what about the three-year-old Android scanner your warehouse team relies on? Validating performance across a diverse range of client devices is absolutely critical for real-world success.
For those who wish to gain a comprehensive view of coverage, understanding how to use a heat map for Wi-Fi is an invaluable skill during this phase.
Assembling a Friendly User Pilot Group
Once you are confident the network is technically sound, it is time to observe how it handles actual user behaviour. Assembling a small, controlled pilot group is the ideal way to gather this feedback without disrupting the entire operation.
Your pilot group should be a deliberate mix of individuals who can offer diverse perspectives. We highly recommend including:
- Tech-Savvy Staff: A few individuals from your IT department or other technically inclined employees. They can provide detailed, specific feedback.
- Everyday Employees: Include representatives from various departments—reception, the sales floor, the back office. Their feedback serves as the ultimate test of day-to-day usability.
- Trusted Guests: If possible, invite a few regular customers or partners. They provide an invaluable external perspective on the guest network's ease of use, particularly the login process.
Ensure you brief the group on what is being tested and provide them with a simple method to report back, such as a dedicated email address or chat group. It is important to capture both positive and negative feedback.
Phased Rollout for a Smooth Transition
With solid technical results and positive feedback from your pilot group, you are ready to go live. However, unless your venue is exceptionally small, avoid a "big bang" launch where everyone is switched over simultaneously. A phased rollout minimises risk and prevents your support team from being overwhelmed.
Consider rolling out the new network section by section. For a hotel, you could start with one floor, monitor it for a day or two, and then proceed to the next. In a large retail store, you might launch in the stockroom and staff areas first before enabling it on the main sales floor. This staggered approach ensures that if any unforeseen issues arise, they are contained and can be resolved quickly. This careful process is the final piece of the puzzle to set up Wi-Fi that delivers an excellent experience from day one.
Using Your Wi-Fi as a Data and Marketing Tool
With the technical deployment complete, it is time to shift focus. The real work begins now: proving the return on your investment and transforming your new Wi-Fi network into a genuine growth engine.
Your Wi-Fi is no longer merely a line item on the expense sheet. It is now a rich source of first-party data that empowers you to understand visitor behaviour and directly influence your bottom line.
This journey begins in the Purple analytics dashboard. Familiarise yourself with this interface, as it is your window into how people physically move through and interact with your space. We are not simply counting connections; we are uncovering patterns and habits.
Turning Data into Actionable Insights
The dashboard provides an immediate, clear view of the metrics that matter for any physical venue. You can instantly view visitor numbers, track how long people stay (dwell times), and, crucially, measure how often they return (repeat visitors).
This is where you transition from guesswork to data-backed decisions. For example, you might discover that first-time visitors who stay for more than 30 minutes are 50% more likely to return within a month. That is a powerful insight capable of reshaping your entire marketing approach.
The true power lies not just in observing the data, but in utilising it to create personalised experiences. The goal is to ensure every visitor, whether it is their first or fiftieth visit, feels uniquely valued.
By connecting Purple to your Customer Relationship Management (CRM) system, you can begin enriching your customer profiles with this real-world behavioural data. This integration effectively closes the loop between your physical and digital environments, allowing you to trigger automated communications that feel personal and perfectly timed.
Driving Loyalty and Sales Through Wi-Fi
Imagine a retail store aiming to win back lapsed customers. When a shopper who has not visited in three months walks in, their device automatically connects to the Wi-Fi. This simple action can trigger a workflow within your marketing platform.
Within minutes, that shopper could receive a "Welcome back! Here is 15% off your purchase today" email or text message. This demonstrates how Wi-Fi can be used to create genuine moments of delight and drive immediate sales.
Here are a few additional practical examples of what is possible:
- Hospitality: A day after checking out, a hotel guest automatically receives an email requesting a review and offering an early-bird discount on their next booking.
- Restaurants: A regular diner who has visited five times in the past two months receives a notification about an exclusive tasting event for a new menu.
- Shopping Centres: After a visitor leaves the premises, they could be sent a brief survey regarding their experience, accompanied by a voucher for their next visit as a token of appreciation.
This is how you evolve beyond merely providing a connection. By leveraging analytics and marketing automation features, you transform your Wi-Fi from a simple utility into your most powerful tool for understanding your audience, personalising their journey, and ultimately, growing your business.
Got Questions About Your Business Wi-Fi Setup? We Have Answers.
Once you’ve rolled out your new network, a few questions are bound to pop up as you get to grips with managing and optimising the system. Here are some straightforward answers to the queries we hear most often from businesses setting up their Wi-Fi with the Purple platform.
How Long Does a Business Wi-Fi Setup with Purple Take?
While you may be accustomed to traditional network projects dragging on for months, deploying with Purple is an entirely different experience. Because our platform is cloud-based and features direct integrations with leading vendors like Meraki and Aruba , we frequently see clients get fully up and running in just a few weeks.
Naturally, the exact timeline depends on the complexity of your site, but our approach to auto-provisioning and zero-trust access significantly reduces the time it takes to go live.
Can I Use My Existing Wi-Fi Hardware with Purple?
In almost all cases, yes. We designed Purple to be vendor-agnostic, ensuring it works seamlessly with a vast range of popular hardware. This includes equipment from Cisco Meraki , Aruba , Ruckus , Mist , and UniFi .
The platform integrates directly with the access points you already own. This means you can implement incredibly secure, passwordless access and powerful analytics without a costly and disruptive hardware replacement.
The ability to utilise your current equipment is a massive advantage. You can enhance your network's security and unlock new capabilities without having to rip and replace everything, saving a significant amount of time and budget.
Is OpenRoaming Difficult to Implement for Guest Wi-Fi?
Not with Purple. As a certified OpenRoaming provider, we handle all the complex backend configuration for you.
For your business, enabling it is as simple as a few clicks in the Purple portal once your network is integrated. From that point onward, any guest with an OpenRoaming profile on their device will connect automatically and securely, without ever needing to view a login screen or enter a password. It simply works.
Transform your venue’s Wi-Fi from a simple utility into a powerful strategic asset. With Purple, you can deliver secure, passwordless access and unlock rich visitor analytics. Discover how Purple can elevate your business today.