
A top-tier enterprise Wi-Fi network isn't built on powerful hardware alone. It's built on a solid foundation of strategic planning. Before you even think about deploying a single access point, you need to get crystal clear on your business goals. This ensures the network you build is secure, scalable, and perfectly matched to your venue's unique demands.
Building a Bulletproof Foundation for Your Wi-Fi Setup
Jumping straight to choosing hardware is a common mistake I've seen countless times. The most successful deployments start with a much more fundamental question: what do you actually need this network to do? A robust Wi-Fi network is more than just a signal; it’s a business asset that should be driving real outcomes.
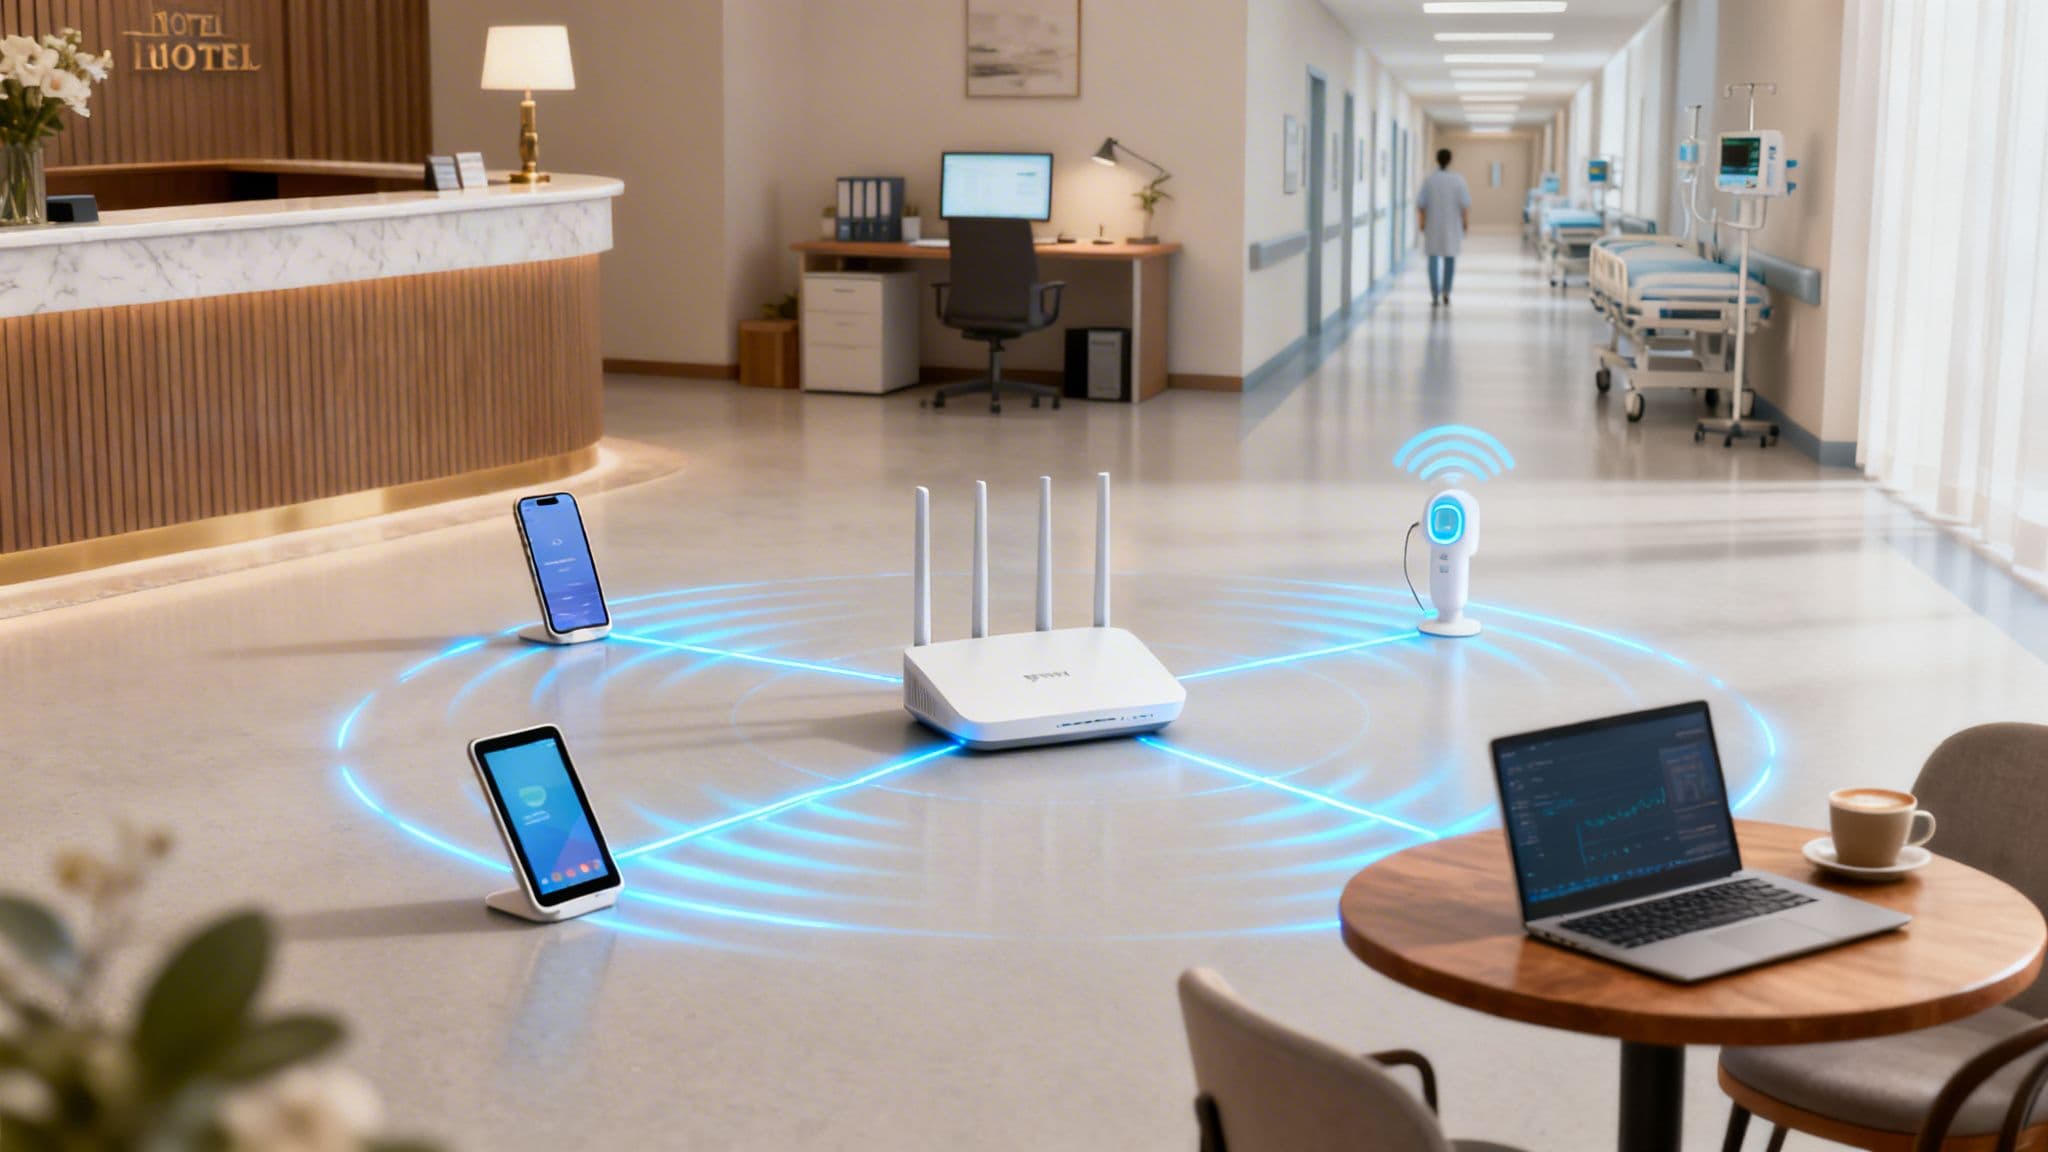
This initial planning phase is all about translating your operational goals into concrete technical requirements. For a hospital, the top priority might be rock-solid connectivity for critical medical IoT devices. For a shopping centre, it might be about capturing footfall data to understand shopper behaviour. Both are valid goals, but they lead to very different network designs.
Starting with a Meaningful Site Survey
A professional site survey is completely non-negotiable. This isn't just about wandering around with a laptop checking for signal bars. A proper survey involves meticulously mapping out your physical environment to understand how it will mess with radio frequency (RF) behaviour.
Here's what a pro survey looks for:
- Building Materials: Concrete, metal, and even some types of tinted glass are Wi-Fi killers. An office full of glass walls requires a totally different access point (AP) map than an old building with thick concrete floors.
- User Density: Think about your high-traffic zones. Lobbies, conference halls, and student common rooms need more APs running at lower power. This handles the load without creating a mess of interference.
- Interference Sources: Your Wi-Fi isn't alone. Microwaves, cordless phones, and especially your neighbours' Wi-Fi networks can wreak havoc. Spotting these early is critical for a stable network.
This simple workflow shows how any successful Wi-Fi project should move from physical assessment to a clear, strategic definition of its purpose.

Following this process ensures your network is grounded in reality, not guesswork.
Defining Your Network Requirements
Once you've got the lay of the land, it's time to define the "who, what, and why" of your network. This means creating a checklist of requirements that will guide every decision you make later, from security protocols to SSID design. You're aiming to build a network that serves its users effortlessly while giving value back to the business.
The biggest mistake I see is over-provisioning without a clear purpose. A much better approach is to define your user profiles first. Ask yourself: what does a guest need versus a staff member, or a payment terminal versus a security camera? Getting this clarity upfront saves a world of complexity down the line.
The demand for high-performance connectivity has never been higher, and user expectations are through the roof. In the UK, this is especially true. Ofcom forecasts that gigabit-capable broadband will reach 89.6% of premises by early 2026. People expect fast, seamless experiences everywhere they go.
Furthermore, a 2026 FarrPoint study revealed that 80% of UK local authorities now list digital connectivity as a top priority. A professional Wi-Fi setup is no longer a "nice-to-have" for any public-facing venue; it's essential.
Laying this groundwork ensures your Wi-Fi isn't just a cost centre but a strategic tool. By aligning physical realities with business goals right from the start, you create a network that’s ready for the future, secure by design, and capable of delivering a first-class experience for every single user.
Designing a Smart SSID and VLAN Architecture
I’ve walked into countless venues and seen the same mistake over and over: a dozen different Wi-Fi network names, one for every conceivable purpose. A messy Wi-Fi setup like this is often the real reason behind poor performance and gaping security holes.
This approach doesn’t just confuse users; it actively degrades your network by flooding the airwaves with unnecessary broadcast and management traffic. The real trick is to think in layers.
You can solve this with a smart combination of just a few strategic Service Set Identifiers (SSIDs) and multiple Virtual LANs (VLANs). An SSID is just the public name you broadcast. A VLAN, on the other hand, is how you partition your network on the back end, creating isolated virtual networks so that devices on one VLAN can’t see or interact with devices on another.
Segmenting Your Network for Security and Performance
For most venues, a three-pronged segmentation strategy is a fantastic starting point. It gives you a solid foundation for security and management without making your Wi-Fi setup overly complex.
Guest Network: This is your public-facing Wi-Fi, and it needs its own completely isolated VLAN. The only goal here is to provide internet access while strictly walling it off from any internal company resources. You absolutely must enable client isolation on this network to stop guest devices from attacking each other.
Staff Network: This network is for all your employee-owned devices, from work laptops to corporate mobile phones. This VLAN will need access to internal resources like shared drives and printers, but that access must be governed by a modern zero-trust security model.
IoT & Operations Network: This is arguably the most critical—and most often forgotten—segment. It should be on a highly restricted VLAN, housing essential devices like Point of Sale (POS) terminals, security cameras, and digital signage. These devices need rock-solid connectivity but must be locked down to communicate only with specific, required servers and absolutely nothing else.
The old way of thinking was to create a separate SSID for every department—"Sales-WiFi," "Marketing-WiFi," "Admin-WiFi." This is a management nightmare. A modern approach uses a single, dynamic staff SSID that assigns users to the correct VLAN based on their identity and role, drastically simplifying the entire architecture.
Putting It All Together in the Real World
Let's look at how this plays out in a couple of common scenarios.
Scenario A: The Hotel
A hotel might only broadcast two SSIDs: "Hotel Guest Wi-Fi" and "Hotel Staff." Simple.
The guest SSID routes all visitors onto a secure, isolated guest VLAN. The staff SSID, however, is much smarter. It uses dynamic authentication to place employees into different VLANs based on their login credentials.
- Front desk staff: Are placed on a VLAN with access to the property management system.
- The maintenance team: Gets a VLAN with access to building control systems.
- POS devices in the restaurant: Are on their own firewalled VLAN that can only reach the payment processor.
Scenario B: The Retail Chain
A retail chain can simplify things even further, potentially using a single SSID for all staff that authenticates against a central identity provider like Microsoft Entra ID or Okta .
An employee’s role in the directory automatically assigns their device to the correct VLAN, whether they need access to inventory systems or just corporate email. This approach simplifies the Wi-Fi setup across hundreds of stores, making management consistent and massively scalable.
Implementing a Zero-Trust Security Framework
Let’s be honest, shared passwords and pre-shared keys (PSKs) are a security nightmare just waiting to happen. For any modern enterprise or venue Wi-Fi, a much tougher, identity-first approach is non-negotiable. It’s time to move on from the old "trust but verify" mindset and embrace a zero-trust framework where no device or user is trusted by default.
This security model isn’t just another industry buzzword; it’s a fundamental shift in how you control access. Instead of one password for everyone, access is tied directly to a verified, unique identity. This means every single connection attempt is scrutinised and authenticated before it gets anywhere near your network.

Moving Beyond Risky Guest Portals
For guest access, the first job is to get rid of those risky captive portals that rely on shared credentials. Technologies like Passpoint—and the roaming federation that powers it, OpenRoaming—offer a vastly superior alternative. These standards create automatic and secure connections without anyone needing to lift a finger.
Picture a visitor walking into your venue. If they have a Passpoint profile on their device, it automatically recognises the network, encrypts the connection from the very first data packet, and gets them online securely. No forms to fill out, no passwords to type in.
This delivers a completely frictionless experience for your visitors while massively improving your security posture. It’s the same underlying tech that lets your phone seamlessly switch between mobile towers as you travel.
Passpoint is the underlying technology that creates an encrypted link between a device and an access point. OpenRoaming is the framework that allows users to roam securely across thousands of different Wi-Fi networks globally, all authenticated by a single, trusted identity provider.
By adopting this, you aren't just improving your own Wi-Fi; you're joining a global ecosystem of secure, effortless connectivity.
Using Cloud Identities for Staff Access
For your internal team, the zero-trust model really shines by integrating directly with the cloud identity providers you already use. Instead of managing a separate, clunky list of Wi-Fi passwords, you can tie network access to the same credentials employees use for everything else.
This is typically done using certificate-based authentication ( EAP-TLS ), which is the gold standard for secure wireless networking .
Here’s a look at how it works in practice:
- Integration: You connect your Wi-Fi authentication platform, like Purple, to your central user directory, such as Microsoft Entra ID , Google Workspace , or Okta .
- Provisioning: When a new employee is added to the directory, a unique security certificate is automatically pushed to their corporate devices.
- Authentication: When they try to connect to the staff Wi-Fi, their device presents this certificate. The network checks it against the identity provider and grants access based on their specific role and permissions.
The entire process is invisible to the user, but the security benefits are immense. There are simply no passwords to be phished, stolen, or shared around the office.
A core advantage here is automatic revocation. If an employee leaves the company and their account is disabled in your main directory, their Wi-Fi access is instantly and automatically cut off. No more lingering credentials that could be misused, which solves a massive headache for any IT department.
The need for this kind of secure, integrated access is only growing. According to Ofcom's 'Mobile Matters' report data from October 2024 to March 2025, 5G integration now makes up 28% of all mobile connections in the UK. In busy sectors like retail and healthcare, this means your Wi-Fi must work hand-in-glove with mobile infrastructure, providing secure offload capabilities. This is where a zero-trust model excels, as platforms like Purple’s integration with Google Workspace can deliver staff Single Sign-On (SSO) and auto-provisioning based on directory changes, all without needing cumbersome on-premises RADIUS servers. You can find more insights on UK mobile traffic trends from RCR Wireless News.
By implementing a zero-trust security framework, you finally ditch the archaic and insecure methods of the past. You create a Wi-Fi setup that is not only easier to manage but is also fundamentally safer for everyone involved.
Crafting a Seamless Onboarding Experience
Think of your Wi-Fi onboarding as the first digital handshake you have with a guest. If that handshake is fumbled with a clunky portal, a forgotten password, or a confusing sign-up form, it immediately creates frustration and reflects poorly on your venue. The aim is to design a Wi-Fi setup that feels completely effortless, both for first-time visitors and for your own staff.
For guests, a frictionless experience means finally ditching outdated login methods. Picture a visitor connecting just once with a simple email or social media account, and on every future visit, their device connects automatically and securely. This isn't some far-off concept; it's a practical reality with modern authentication platforms that recognise returning devices and get people online instantly.
This sort of one-time onboarding cuts out the single biggest point of failure in public Wi-Fi access, delivering an experience that simply works.
Simplifying Access for Guests and Staff
The expectations for public Wi-Fi have never been higher. The UK, with its 97.8% internet user penetration, is a perfect example of a market where good connectivity is just assumed. With fixed broadband speeds rocketing up by 32.4% year-over-year to an average of 143.83 Mbps, users expect a fast, reliable experience wherever they go. This is the perfect environment for venues to finally replace insecure, shared passwords with a secure, identity-based network. You can dig into more data on the UK's digital landscape in this comprehensive report from DataReportal .
For your staff, the focus is all about efficiency and security, which is where Single Sign-On (SSO) comes in. Your employees shouldn't have to juggle yet another password just for the Wi-Fi. By integrating your network authentication with your corporate identity provider—whether that’s Microsoft Entra ID , Google Workspace , or Okta —staff can connect using the exact same credentials they already use for everything else.
This approach creates a completely zero-friction experience for them, and it seriously boosts security by tying network access directly to their corporate account.
Onboarding in Multi-Tenant Buildings
The challenge of creating a smooth onboarding experience gets a lot trickier in multi-tenant environments like business parks, student housing, or shared office spaces. In these setups, you're not just managing one group of users; you're managing dozens or even hundreds of separate tenants, all of whom need their own private, secure network bubble.
Broadcasting a unique SSID for every single tenant is a recipe for disaster. It absolutely clogs up the airwaves with unnecessary management traffic, degrading performance for everyone. The much more elegant solution is to use a single, shared infrastructure but give each tenant their own virtual network.
A common misconception is that shared infrastructure means shared security risks. With the right architecture, you can provide enterprise-grade isolation and a home-like user experience, even on a single physical network. This is where technologies like individual Pre-Shared Keys come into play.
An individual Pre-Shared Key ( iPSK ), sometimes called a Private PSK, is a unique password assigned to a single user or a small group of devices (like all the tech in one apartment: smart TV, laptop, and phones). This unique key maps their devices directly to a dedicated, isolated VLAN.
Here’s how it creates a frictionless experience for everyone:
- For the user: It feels just like their home Wi-Fi. They use one password for all their personal devices, which can then all talk to each other (like casting from a phone to a TV) but are completely invisible to their neighbours.
- For the administrator: You manage everything from a single, central dashboard. Bringing on a new tenant is as simple as generating a new key and assigning it to their VLAN. There’s no complex reconfiguration of network hardware needed.
This approach delivers the best of both worlds: the simplicity and privacy of a personal network for the user, and the efficiency and scalability of shared enterprise infrastructure for the operator. You can learn more about the mechanics of how users connect in our guide on what a captive portal is and its modern alternatives.
Integrating Your Wi-Fi Setup With Existing Hardware
The thought of a massive "rip and replace" project is enough to give any IT manager a headache. It's often the biggest reason businesses put off upgrading their Wi-Fi, fearing huge costs and operational disruption.
But here's the good news: a modern, identity-based authentication platform doesn't demand you throw out your trusted hardware. Instead, it works as an intelligent software layer on top of the network infrastructure you already own. You can get a massive boost in security and user experience without the eye-watering hardware bill.
This approach is all about getting you up and running quickly. By integrating with your current kit from vendors like Cisco Meraki , Aruba , Ruckus , and Ubiquiti UniFi , the goal is to go live in weeks, not months. The whole process boils down to pointing your SSIDs to a new authentication service and setting up the right connections.
Connecting Your Access Points
The key to this whole setup is redirecting the authentication requests from your wireless network to your new identity platform. This is usually done by changing the RADIUS settings on your existing Wi-Fi controller or access points.
Instead of your hardware trying to figure out who is connecting, it simply forwards every connection request to the cloud-based service. This centralises all your control, letting you apply dynamic, identity-based rules across your entire network, no matter who made the hardware.
Let's say you're running a Cisco Meraki network. The change is surprisingly simple:
- Head to the SSID you want to upgrade in your dashboard.
- Switch the network access control from your old pre-shared key or splash page to WPA2-Enterprise with a custom RADIUS server.
- Pop in the RADIUS server details provided by your authentication platform.
That small tweak is what unlocks a world of modern authentication features for the hardware you already paid for. The process is very similar for other big names like Aruba and Ruckus.
The real beauty of this model is that it's completely vendor-agnostic. You could have Meraki APs in one building and Aruba in another, all managed under one consistent authentication and policy system. It brings order to what was once a fragmented mess.
Using API Integrations for Deeper Control
Beyond the basic RADIUS authentication, real power comes from deeper integration using APIs (Application Programming Interfaces). This allows your new platform to not just say "yes" or "no" to a connection, but to actively manage the network itself.
A great example is dynamically assigning users to specific VLANs based on who they are. When someone from the finance team connects, an API call can tell your network hardware to automatically place them on the secure "Finance" VLAN. This creates a highly segmented and secure environment without your IT team lifting a finger.
This API-first approach is what enables powerful features like:
- Dynamic VLAN Assignment: Placing users into secure network segments based on their role in Entra ID or Google Workspace.
- Individual Pre-Shared Keys (iPSK): Creating and assigning unique Wi-Fi keys for specific users or devices, perfect for multi-tenant spaces.
- Bandwidth Throttling: Applying custom speed limits based on a user's profile or even the time of day.
This level of integration turns your existing hardware from a simple box that provides a signal into an active part of your zero-trust security plan. Your wi-fi setup becomes smarter, more secure, and a whole lot easier to manage, all without replacing a single access point.
Turning Your Wi-Fi Data into Actionable Insights

Your new Wi-Fi setup should never be just a sunk cost; it's a powerful business intelligence engine just waiting to be switched on. With your modern, identity-based network up and running, the real work of optimisation and extracting value can finally begin. This is about moving beyond simply providing a connection and starting to turn anonymous footfall into tangible, valuable data.
The very first thing you need to do after deployment is test. And I don't just mean checking for a signal. You need a practical plan to validate every single aspect of the new system, from the user experience of your onboarding flow to the integrity of your security policies. Are staff members being correctly assigned to their designated VLANs? Is client isolation working perfectly on the guest network? Answering these questions with real-world tests is absolutely critical.
Unlocking the Power of Network Analytics
Once everything is validated, you can shift your attention to the goldmine of data your network is now collecting. Modern Wi-Fi analytics platforms provide insights that were once impossible to gather, effectively transforming your venue into a smart space. This is where your Wi-Fi setup really starts paying for itself.
You can now track key behavioural metrics, such as:
- Visitor Frequency: See who your most loyal customers are by identifying who returns most often.
- Dwell Times: Measure exactly how long visitors spend in specific areas or zones within your venue.
- Peak Traffic Hours: Get a concrete understanding of your busiest periods, which helps with better staff scheduling and resource allocation.
By analysing this data, a retail manager could discover that 70% of weekend visitors spend most of their time near a new product display but only 15% actually make a purchase. This is a direct signal to retrain staff or adjust the in-store marketing for that specific zone.
These insights are made possible by understanding device presence and movement. For instance, a well-placed access point can create a Wi-Fi heat map of your venue , visually showing which areas are hotspots and which are getting the cold shoulder. This is invaluable information for optimising store layouts, placing high-margin products, or even identifying underutilised areas in a large office.
Proving ROI by Connecting Wi-Fi to Business Growth
The true power of this first-party data is unleashed when you connect it to your other business systems. Integrating your Wi-Fi analytics platform with your Customer Relationship Management (CRM) or marketing automation tools is how you finally close the loop between the physical and digital worlds.
Imagine a hotel guest connecting to the Wi-Fi. Their presence is logged, and on their third visit, the system automatically sends a targeted offer straight to their email—perhaps a complimentary drink at the bar or a discount on their next stay. This is how you create personalised experiences that build real loyalty and drive revenue.
By linking Wi-Fi engagement directly to sales, promotions, and customer behaviour, you can finally prove the return on investment (ROI) of your network. Your Wi-Fi stops being just another line item on the IT budget and becomes a quantifiable driver of business growth.
Your Top Wi-Fi Setup Questions, Answered
When you’re tackling a major Wi-Fi project, it’s easy to get bogged down in the details. We talk to IT admins and venue operators every day, and we tend to hear the same questions pop up time and again. Let's get them answered so you can get your project off the ground with confidence.
One of the biggest worries is always security, especially when it comes to guest privacy. A modern, identity-based network is designed from the ground up to protect everyone. By using VLANs and enabling client isolation on your guest network, you're effectively stopping connected devices from ever seeing or interacting with each other. It’s a fundamental security step.
This means a guest using your Wi-Fi is not just walled off from your private company network, but also from every other guest in your venue. Their connection becomes a private tunnel straight to the internet, and nothing else.
What About Wi-Fi 7 and Future-Proofing?
Another hot topic is the arrival of new standards like Wi-Fi 7. Should you hold off on your upgrade? While Wi-Fi 7 brings some exciting new tricks to the table, like Multi-Link Operation (MLO) for higher speeds, the truth is that the core principles of a solid Wi-Fi deployment haven't changed.
The biggest wins in performance and security don't come from the very latest wireless standard, but from a well-designed architecture. A zero-trust security framework and smart network segmentation will give you far more tangible benefits today than waiting for future hardware.
Wi-Fi 7 hardware is still finding its feet, and features like MLO are maturing. For most enterprise environments, the immediate priority should be implementing robust identity and access controls. That foundation will serve you well, no matter which wireless technology is running underneath.
How Do I Measure Success and Prove the Value?
Finally, how do you actually know if your new Wi-Fi setup is a success? It's about so much more than just good signal strength. True success is measured by a mix of practical, real-world outcomes:
- Fewer IT Support Tickets: A seamless, passwordless system for both staff and guests drastically cuts down on calls about forgotten passwords and connection problems. That’s a real win for your IT team.
- Actionable Analytics: You should be able to track metrics like visitor frequency, dwell time, and peak traffic hours. The real value comes when you can use that data to make smarter business decisions.
- Demonstrable ROI: This is the big one. Can you connect your Wi-Fi data to your CRM or marketing platforms? Showing a direct link between network engagement and a boost in revenue or customer loyalty is how you prove its worth.
When you start focusing on these outcomes, your network stops being a simple utility and becomes a strategic asset for the business.
Ready to deploy a secure, identity-based network that delights users and delivers real business value? Purple replaces clunky portals with passwordless access that integrates with your existing hardware. Discover how Purple can modernise your Wi-Fi setup.