
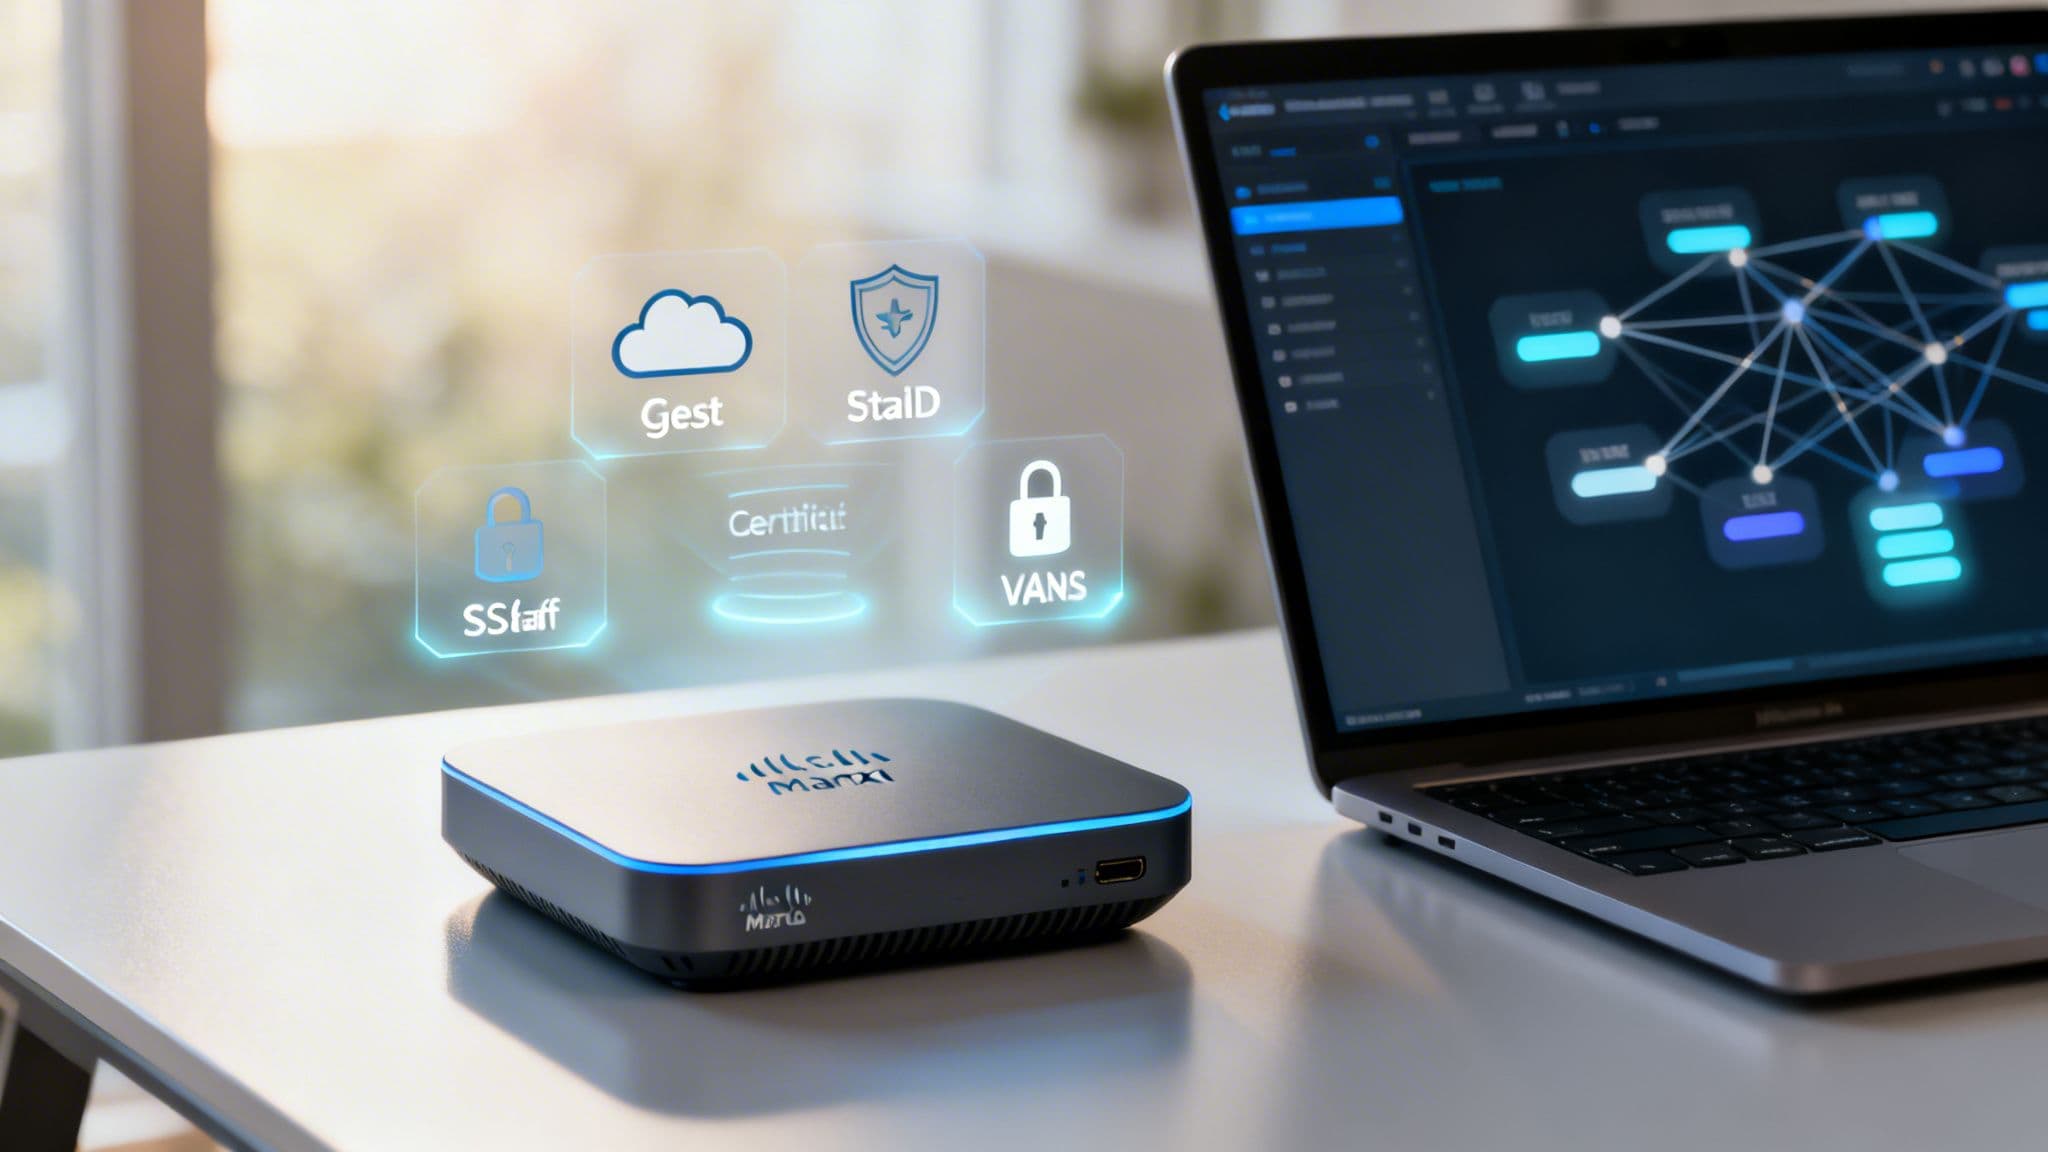
Getting your Cisco Meraki wireless access points to work seamlessly with a platform like Purple isn't just about plugging them in. It’s about building a solid foundation first. A deployment is more than hardware; it’s a cloud-managed ecosystem that forms the bedrock for secure, identity-based access for both your guests and staff.
Laying the Groundwork for Meraki and Purple Integration
Before you even think about configuring an SSID or letting a user connect, the success of your whole project boils down to getting the prep work right. I’ve seen it time and time again: deployments that stall or hit bizarre, hard-to-diagnose walls. Almost every time, the root cause is skipping a few critical prerequisites.
Think of it as groundwork. Rushing this stage is the quickest way to create frustrating problems for yourself down the line.
Verifying Licensing and Firmware
Your first stop is the Meraki dashboard. The absolute first thing to check is your licensing. A valid, active licence is what allows your access points to talk to the Meraki cloud—without it, you can't configure or monitor anything. It's non-negotiable.
Just as critical is the firmware on your access points. Meraki pushes out regular updates that do more than just patch security holes; they also enable new features. To get Purple working correctly, your APs, like the common MR44 or MR56 models, must be running a compatible firmware version. This is what unlocks advanced capabilities like OpenRoaming and, for UK deployments, access to the less-congested UNII-3 channels, which can be a game-changer in crowded areas.
A common mistake is assuming brand-new hardware comes with the latest firmware. Always schedule a maintenance window to check and update your APs in the dashboard before you touch any other settings.
Planning Network Topology and Firewall Rules
Once you've sorted licensing and firmware, it's time to look at your network architecture. I've seen countless headaches caused by poor planning here, like guest devices getting IP addresses from an internal staff DHCP server. Proper network segmentation using VLANs is essential to isolate guest traffic from your corporate network from the very beginning.
This flow diagram shows the basic sequence for preparing your Meraki wireless access point setup.
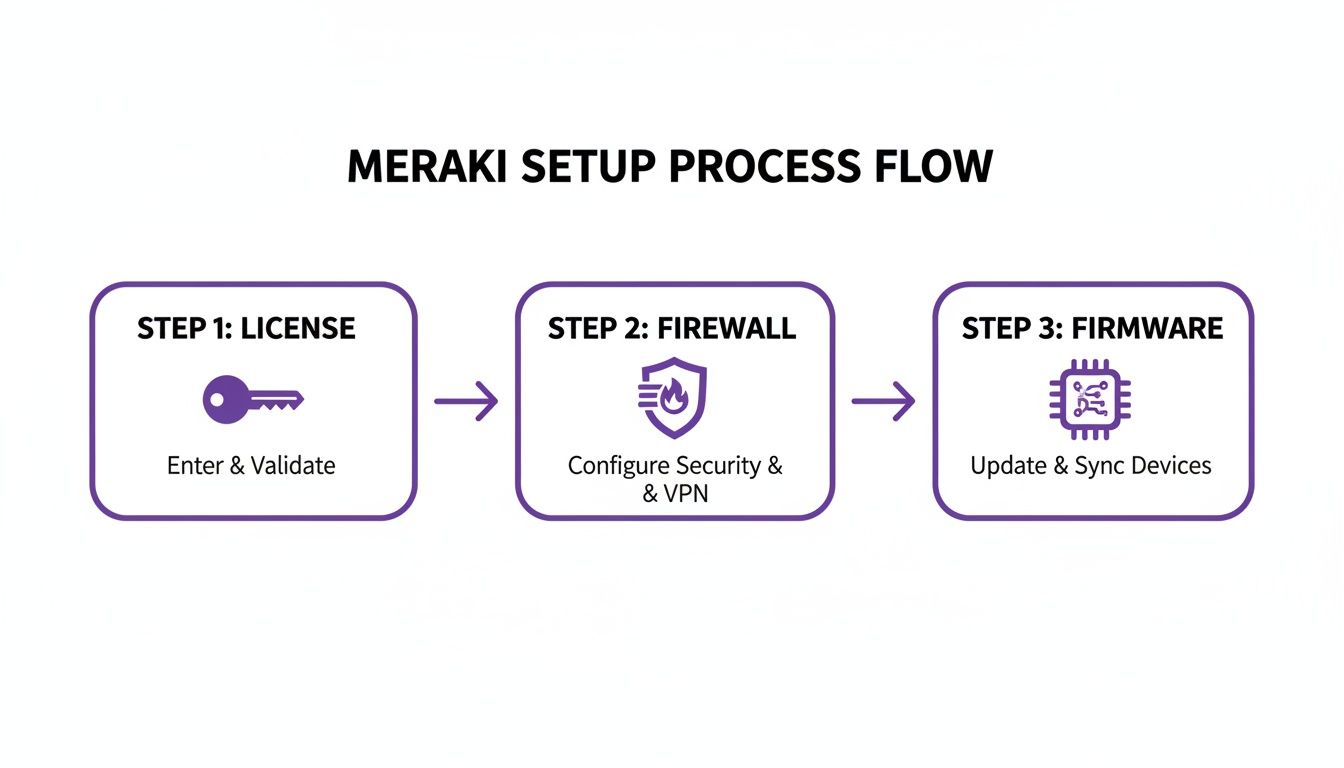
Following this path—validating licences, sorting firewalls, and updating firmware—is the most reliable way to head off the most common setup problems before they start.
Finally, you need to tell your network firewall to allow your Meraki gear to communicate with Purple's cloud services. This means creating rules that permit traffic to specific hostnames and ports. If these rules aren't in place, authentication requests from the captive portal or RADIUS server will simply fail, and users won't be able to connect. It's a simple step, but it's amazing how often it gets missed.
For those wanting to make this even easier, you can learn more about automatic provisioning with Meraki , which handles many of these initial tasks right from the Purple portal. Taking a bit of extra time on these fundamentals will make your deployment smoother, more secure, and ready for the more advanced configurations to come.
Configuring Meraki SSIDs for Secure Guest and Staff Access
Now that we’ve sorted the groundwork, it’s time to build the actual wireless networks your users will connect to. A successful wireless access point meraki deployment hinges on creating distinct Service Set Identifiers (SSIDs) for different groups. This isn’t just about giving them different network names; it's about crafting entirely separate experiences with their own security postures.
Let's stick with our boutique hotel scenario. The hotel needs a frictionless, open network for guests and a highly secure, password-free network for staff handling everything from bookings to point-of-sale systems. We'll set up two SSIDs in the Meraki dashboard to cater to these completely different needs, integrating both with Purple to manage access and identity. This separation is your first line of defence and a critical step towards solid network isolation.
Creating the Secure Staff Network
For staff, the main goal is to get rid of passwords completely. Shared keys are a security nightmare and an administrative headache. Instead, we’ll create an SSID that uses WPA2-Enterprise with certificate-based authentication, all managed through Purple and hooked into a directory service like Entra ID .
First, jump into your Meraki dashboard and navigate to Wireless > Configure > SSIDs. Pick an unused SSID slot and flick it on.
- SSID Name: A clear naming convention is essential here. Something like
HotelStaff_Secureimmediately tells you its purpose and who it's for. - Security: Select
WPA2-Enterprise with my RADIUS server. This is the key. You'll point this to the RADIUS details from your Purple account, which will handle the authentication. - Splash Page: Make sure this is set to
None. Authentication is handled by the user's device certificate, not a web portal.
With this setup, a staff member's network access is tied directly to their identity in your company directory. If they leave the business and their account is disabled in Entra ID, their network access is cut off instantly and automatically. No more scrambling to change passwords.
This certificate-based approach effectively kills the traditional password, moving your organisation towards a zero-trust security model. It’s a significant upgrade from managing pre-shared keys or individual user accounts on a local server.
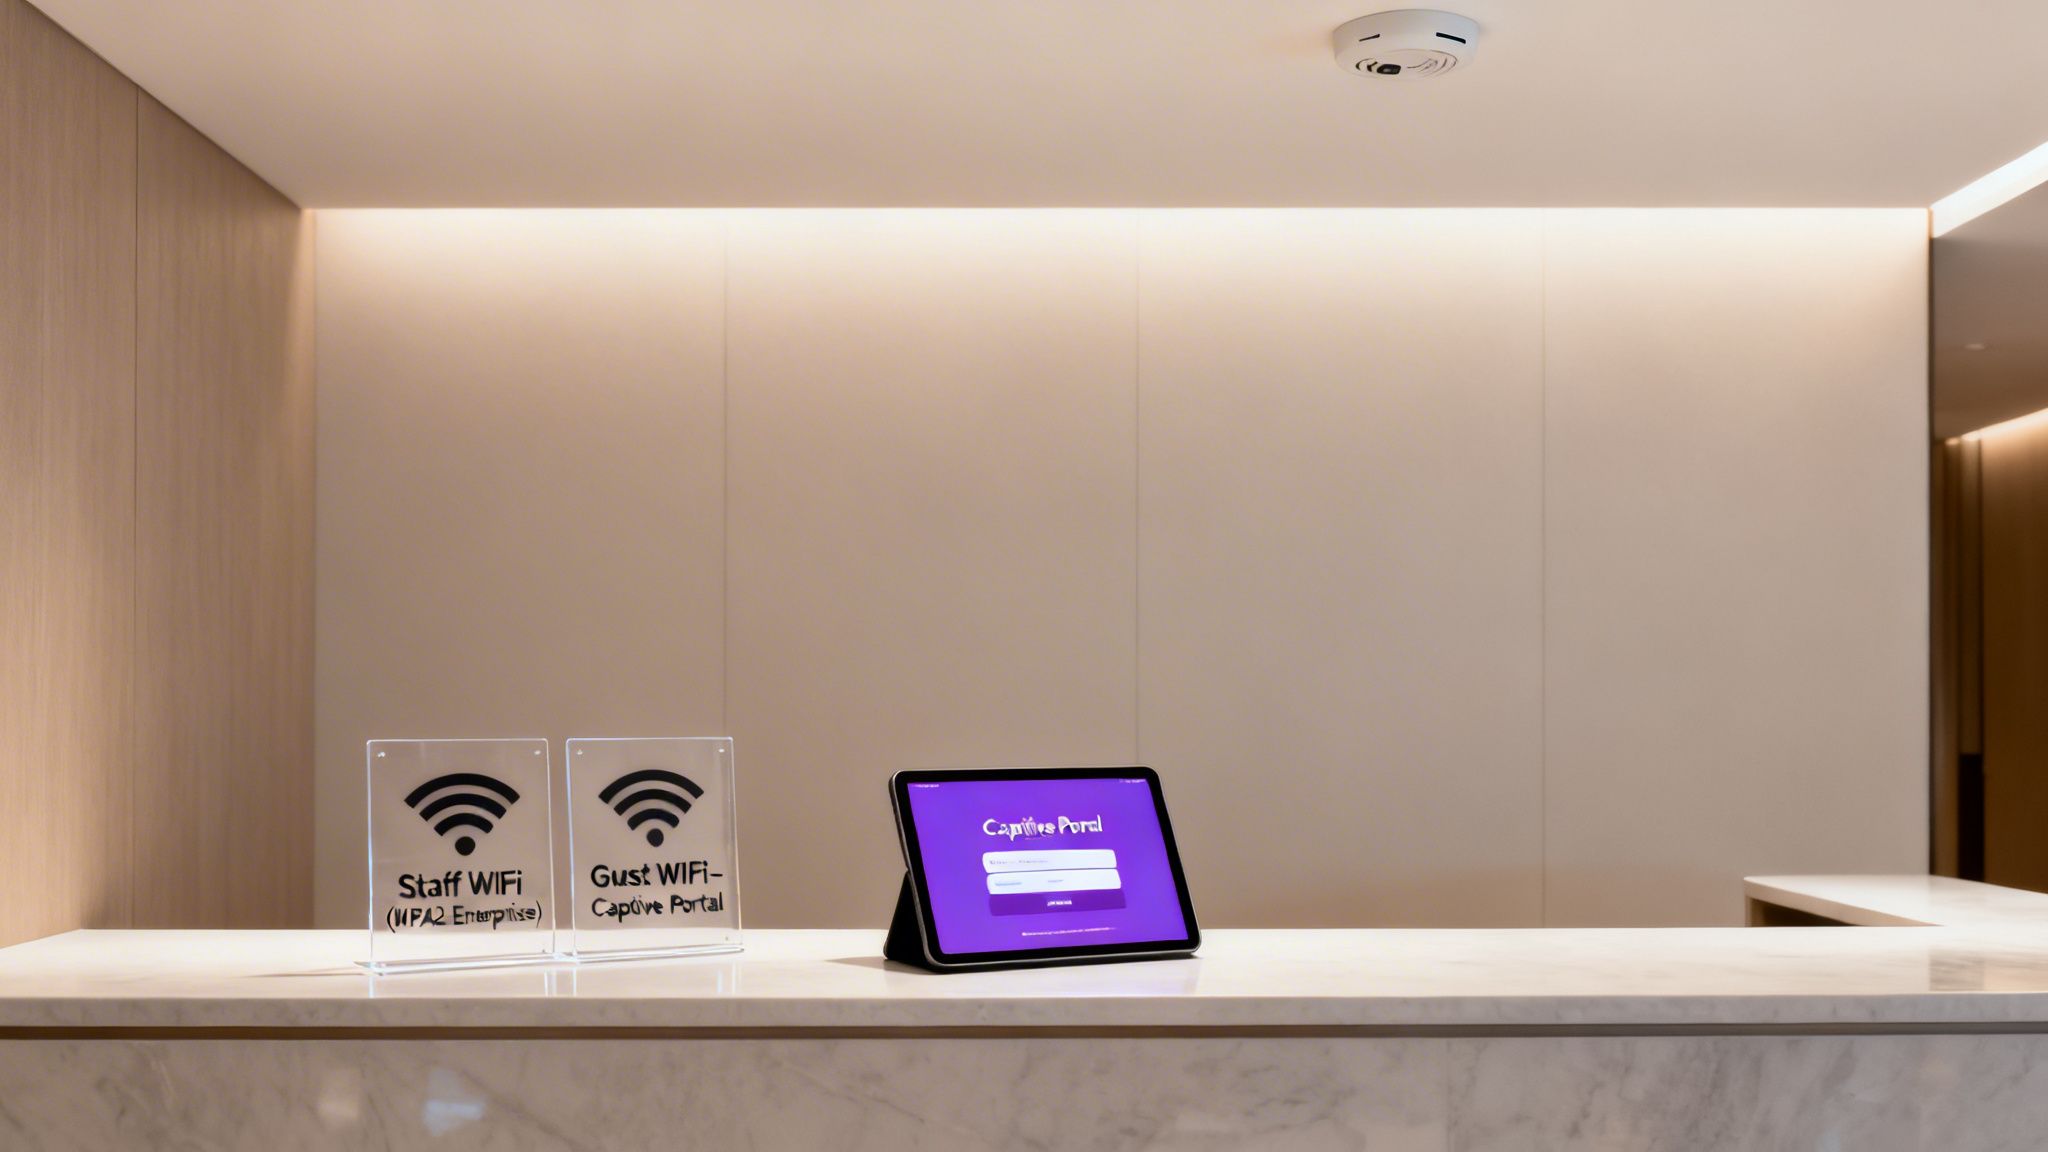
Building the Seamless Guest Network
For guests, the priority is the complete opposite: an incredibly simple and easy connection. Here, we'll use an open SSID with a captive portal that directs users to Purple for authentication. This allows the hotel to gather valuable guest data (with their consent, of course) and provide a professional, branded login journey.
Back on the SSID configuration page, grab another available slot for your guest network.
- SSID Name: Make it obvious and inviting.
HotelGuest_WiFiis a common and effective choice. - Security: Choose
Open (no encryption). This removes any initial hurdles for guests trying to get online. - Splash Page: This is the most important setting for the guest experience. Select
Click-throughorSign-on with...and point it to the custom URL for your Purple captive portal.
When a guest connects, their device will be automatically redirected to this portal. From there, they can log in using a social media account, a form, or any other methods you've set up in Purple. This process not only gives them internet access but also provides the hotel with first-party data for marketing and improving the guest experience, all while ensuring compliance with data protection regulations.
Guest vs Staff SSID Configuration at a Glance
To make it crystal clear, here’s a quick comparison of how we’ve approached these two very different networks.
By implementing these two distinct SSIDs on your wireless access point meraki hardware, you create a network that is both user-friendly for visitors and exceptionally secure for internal operations. Best of all, it's all managed through a single, centralised cloud dashboard.
Activating Next-Gen Connectivity with OpenRoaming

While a captive portal is a great starting point for guest engagement, it's time to think beyond a simple login. The goal should be to move from a functional transaction to a truly seamless experience. This is exactly where OpenRoaming comes into play, transforming your guest WiFi from a one-off connection into a persistent, secure, and automatic handshake.
Imagine a visitor connecting at your venue once. When they return—or even visit another participating business across town or in another country—their device connects automatically without them lifting a finger. That’s the power of OpenRoaming, which is built on Passpoint technology. It essentially gives your guests a global WiFi passport, and getting it running on your wireless access point meraki network with Purple is surprisingly straightforward.
Enabling OpenRoaming in the Purple Portal
Your journey begins inside the Purple portal. This is where you’ll tell our platform to start broadcasting OpenRoaming capabilities, and it only takes a few clicks to get the ball rolling.
Within your Purple account, just navigate to the venue or group you want to switch on. You'll find the OpenRoaming settings under the management section for your network.
- First, enable the OpenRoaming service for the venue.
- Next, choose the authentication types you want to support.
- Finally, link it to the guest SSID you configured earlier.
This simple action instructs Purple to start generating the necessary profiles and credentials for Passpoint-enabled devices. In effect, Purple acts as the broker of trust, vouching for your network within the global OpenRoaming federation.
By enabling OpenRoaming, you are fundamentally changing the guest WiFi value proposition. It shifts from a simple amenity to a frictionless, encrypted service that fosters loyalty and enhances security from the very first packet.
Configuring Your Meraki SSID for Passpoint
With Purple ready to go, the final piece of the puzzle is to configure your Meraki guest SSID to announce these new capabilities. This involves enabling a specific setting in your Meraki dashboard known as 802.11u, an IEEE standard that allows access points to provide information about the network before a device even connects.
Jump back into your Meraki dashboard and find the guest SSID you set up.
- Head over to Wireless > Configure > Access control.
- Locate the "Network access" section for your guest SSID.
- Change the association requirement from "Open" to Open (with WPA2-Enterprise). This might seem odd, but it’s what enables the secure Passpoint handshake to take place.
- Switch on the Hotspot 2.0 / Passpoint option.
- Select the appropriate operators and settings as directed by your Purple configuration guide.
Once you save these changes, your Meraki access points will begin broadcasting the information needed for Passpoint-compatible devices to discover and automatically connect to your network through OpenRoaming. You can discover more about how OpenRoaming works in our detailed guide.
This setup is a real game-changer in retail and hospitality, where visitor experience is paramount. Cisco Meraki is a significant force in this space, holding a 4.48% share among UK enterprises for customer engagement platforms powered by wireless hardware. This is backed by its dominance in cloud-managed networking, where it commands a majority of revenue and device management share, showing just how many venues are poised to benefit from this technology. You can see more about Cisco Meraki's market position on ZoomInfo. By activating this feature on your wireless access point meraki network, you tap into a powerful ecosystem that really sets your venue apart.
Integrating Directory Services for Zero-Trust Staff Authentication
Shared passwords for staff Wi-Fi are a massive security headache and an administrative nightmare. It’s time to leave them behind. The modern approach is a zero-trust security model, and the way you get there is by integrating your directory service directly with your wireless access point meraki network, with Purple orchestrating the whole process.
What this means is connecting platforms you already use, like Entra ID, Google Workspace, or Okta. The result is a setup where network access is granted or revoked automatically, based entirely on a user's status in your central directory. This completely does away with the need for clunky, expensive on-prem RADIUS servers, making top-tier security both accessible and manageable.
Embracing Certificate-Based Authentication
At the heart of this zero-trust strategy is certificate-based authentication. Instead of a password, every employee's device gets a unique digital certificate. Think of it as their digital passport for your secure staff SSID. When they connect, their device presents this certificate, which Purple instantly validates against your directory service.
This whole process is invisible to the user. For them, it's a completely seamless, automatic connection—no passwords to remember, no portals to log into. For your IT team, it's a huge security upgrade.
The most powerful part of this setup is the automatic revocation of access. The moment you disable or delete a user in Entra ID, their certificate is invalidated. Their network access is cut off instantly, with zero manual cleanup required on your end.
This tight integration closes a huge security gap that often lingers long after an employee has left the company. To get a better handle on the security model in play here, you can dive into the many benefits of 802.1X authentication in our detailed guide .
Streamlining Your RADIUS Setup
Traditionally, getting this level of security meant setting up and maintaining a dedicated, on-premises RADIUS server—a task known for its complexity and constant upkeep. With a cloud-managed solution, that’s no longer the case. Purple essentially becomes your cloud RADIUS provider, simplifying the entire workflow.
Inside your Meraki dashboard, you just point your WPA2-Enterprise staff SSID to the RADIUS details we provide. Purple takes care of all the communication with your directory service, whether it’s Entra ID or Okta. No servers to patch, no command-line headaches, and no single point of failure sitting in your comms room.
This cloud-first approach is a big reason why Cisco Meraki remains a powerhouse in the UK. Market analysis shows a strong growth trajectory, with a year-over-year increase in market value hitting around 12.14% in key periods. Partner integrations like this one from Purple amplify that value by delivering zero-trust access without the classic RADIUS pain, boosting efficiency in sectors from retail to healthcare.
Handling Legacy Devices with iPSK
Of course, not every device on your network is smart enough for 802.1X authentication. We're talking about things like barcode scanners, older network printers, or specialised IoT sensors. These devices often can't handle digital certificates, but you can't just leave them on an open network.
This is the perfect use case for an Identity Pre-Shared Key (iPSK). It's a clever way to bridge the gap between older tech and modern security standards.
Here’s the breakdown:
- Unique Keys for Each Device: Instead of one password for all your 'headless' devices, you generate a unique key for each one through Purple.
- Individual Identity: Every key is tied to a specific device, so you have full visibility. You'll know exactly which scanner or printer is which on your network.
- Secure Isolation: You can connect these devices to a standard WPA2-Personal SSID but still apply specific network policies or assign them to their own VLAN, keeping them safely segmented from your corporate traffic.
Using iPSK ensures that every single device on your wireless access point meraki network is accounted for and securely connected, no matter what its capabilities are. It’s a practical, effective way to pull your legacy hardware into a zero-trust framework without sacrificing security or visibility.
Optimising Network Performance and Segmentation
Once you have your secure SSIDs and features like OpenRoaming configured, it's time to look under the bonnet and optimise your network's performance. A well-designed network is a high-performing one, and for any wireless access point meraki deployment, that means mastering segmentation and radio frequency (RF) management.
Getting this right ensures a fast, stable connection for every user, which is vital for any venue that relies on its Wi-Fi for operations or monetisation. One of the most common—and serious—mistakes I see is letting guest, staff, and IoT traffic all mix on the same network. This doesn't just create performance bottlenecks; it's a major security risk. We can sort this out using Virtual LANs (VLANs) to create separate, dedicated lanes on our network.
Implementing Secure Network Segmentation with VLANs
Proper network segmentation is your best friend for both security and performance. When you assign each SSID to its own VLAN, you're effectively building digital walls between different traffic types. This is fundamental for preventing "lateral movement," where a device on the guest network could potentially snoop around and try to talk to a device on your secure staff network.
In the Meraki dashboard, we handle this through VLAN tagging.
- Your Guest SSID: Assign this to a dedicated guest VLAN. This funnels all guest traffic to a specific IP subnet, which should have its own DHCP server and strict firewall rules blocking access to any internal company resources.
- Your Staff SSID: This should be assigned to your corporate VLAN, giving it trusted access to internal servers, printers, and applications.
- Your IoT SSID (using iPSK): These devices need their own separate VLAN, too. This keeps potentially vulnerable gadgets like smart sensors or digital signs completely isolated from sensitive corporate data.
Getting this right is crucial. I’ve seen deployments where guest devices were accidentally pulling IP addresses from the corporate DHCP server because of misconfigured VLANs—a simple but critical error to avoid.
Think of VLANs as creating separate, exclusive clubs on your network. A member of the "Guest Club" can't just wander into the "Staff-Only Lounge." This isolation is fundamental to a secure and organised network architecture.
Of course, even the best wireless setup is only as good as its internet connection. It's always wise to ensure you have stable NBN connectivity with 4G backup to prevent any outages from bringing your Meraki network to a halt.
Advanced RF Tuning and Channel Planning
Optimising the airwaves is just as important as organising the data. In busy places like shopping centres, stadiums, or hotels, RF interference is one of the biggest culprits behind poor Wi-Fi. This is where strategic channel planning and Meraki's RF profiles become essential tools.
Meraki’s Auto RF feature does a great job of dynamically adjusting channels and power levels to sidestep interference. For really high-density venues, though, you can get more granular control by creating custom RF profiles. These let you do things like set minimum bitrates, disable old legacy data rates (which can slow everyone down), and fine-tune band steering to nudge more clients onto the faster, less-crowded 5GHz band.
For UK-based deployments, a recent regulatory change has been a game-changer. Cisco Meraki's introduction of UNII-3 channel support in the ETSI domain, which arrived with firmware version 29.1, has been transformative. Before this, UK sites were stuck with just four non-DFS 5GHz channels. Now, supported APs can use additional channels like 155 without DFS delays.
For a venue manager, this means your wireless access point meraki hardware, like the MR57-HW or CW9162I, can now access more spectrum, which dramatically improves capacity and cuts down on interference. You can read more about the UNII-3 update for the UK on the Meraki community forums . By applying these segmentation and RF optimisation techniques, you'll elevate your setup from a basic network to a truly enterprise-grade wireless experience.
Your Meraki & Purple Questions, Answered
When you’re bringing together two sophisticated platforms like your wireless access point meraki network and Purple, it’s natural to have a few questions. You're aiming to create a seamless, secure experience, and getting the details right is crucial.
We hear a lot of the same queries from IT teams during deployment. So, we've gathered the most common ones here to give you quick, practical answers that will help you sidestep potential issues and get the most from your setup.
Can I Use Purple with My Existing Meraki Access Points?
Yes, you almost certainly can. Purple is engineered to integrate smoothly with a massive range of Meraki APs . There’s no need to go out and buy new hardware just to get started.
The key requirements are that your Meraki dashboard has the right licensing and your access points are running a compatible firmware version. This is what lets them talk to external systems for things like RADIUS integration and custom captive portals. As we mentioned earlier, keeping firmware updated is non-negotiable for unlocking these advanced features.
Does Enabling OpenRoaming Create Security Risks?
It’s a common misconception that because the connection is "automatic," it must be less secure. In reality, the opposite is true—it significantly boosts security.
Traditional open guest networks can be a real weak spot, but OpenRoaming uses robust WPA2/WPA3-Enterprise encryption from the very first packet. Authentication is handled by trusted identity providers, which means user traffic is never sent over an unencrypted channel. It's a far safer and more professional experience than any typical captive portal login.
What Happens When a Staff Member Leaves the Company?
Their network access is cut off. Instantly. This is one of the most powerful security wins you get from integrating a directory service like Entra ID or Okta with Purple.
The moment you disable or delete a user's account in your company directory, that change syncs with Purple. Their network authentication certificate is immediately invalidated. Their device can no longer connect to the secure staff SSID. It’s a zero-trust approach that closes the massive security hole left by lingering access credentials.
How Do I Connect Devices That Don’t Support 802.1X?
This is a very real-world problem. Not every device on your network is a modern smartphone or laptop. Think about your network printers, barcode scanners, or various IoT sensors. For these, we rely on Identity Pre-Shared Keys (iPSK).
This feature, which we covered in detail earlier, is the perfect workaround. Here’s a quick reminder of why it works so well:
- Unique Device Identity: You generate a unique pre-shared key for each specific device right from the Purple dashboard.
- Secure Connection: These devices can then connect securely to a standard WPA2-Personal SSID without any complex configuration on the device itself.
- Maintained Segmentation: Critically, even with this simpler connection method, you can still automatically place these devices onto their own isolated VLAN, keeping them well away from your sensitive corporate traffic.
Using iPSK means you don’t have to compromise on security for your legacy or headless devices. It neatly brings every piece of hardware under your secure, centrally managed wireless access point meraki framework, ensuring there are no blind spots on your network.
Ready to transform your network with identity-based access? Discover how Purple can replace passwords, secure your network, and provide a seamless connection experience for everyone. Explore Purple's solutions today .